Home > Type of Tasks > Activitiy Alert
Activitiy Alert
The Activity task will automatically send emails for a scheduled activity.
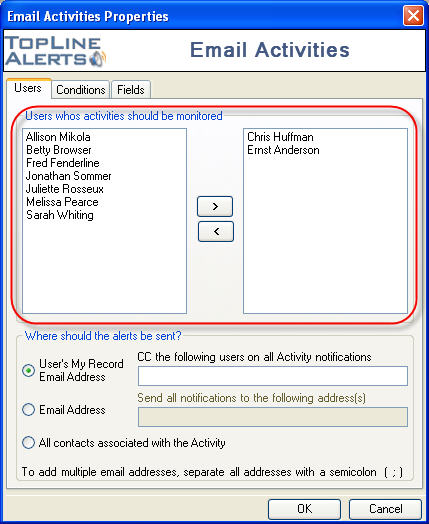
- On the Users tab, select the Record Managers of the activities to monitor.
- Select who should receive the emailed alerts:
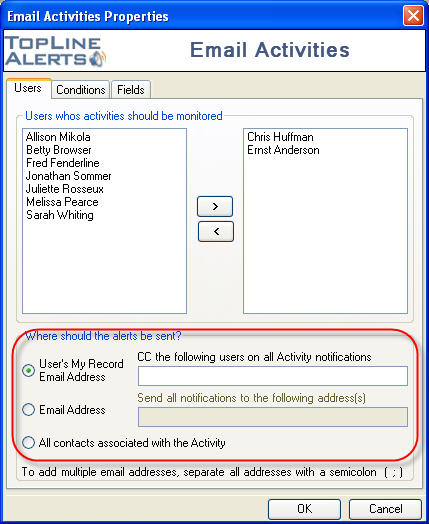
"User's My Record" will email the alert to the Record Manager's email address.
"Email Address" will email the alert to specified email address. Multiple email addresses should be separated by a semicolon.
"All Contacts" will email the alert to the Record Manager's email address and the email address of all scheduled contacts. Blank email address will be skipped.
- Additional email addresses can be CC'd, separated by a semicolon.
- Select which type of activities and priorities should be monitored.
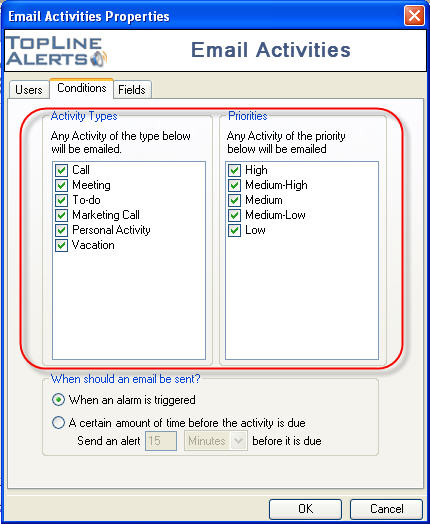
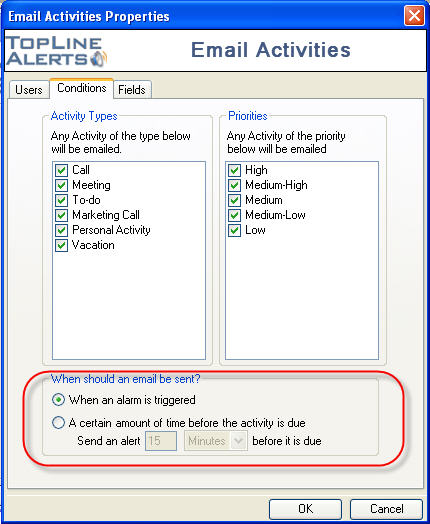
- Alerts can be sent when the alarm is triggered or a specified time period before the activity. Specify this time in Minutes, Hours or Days.
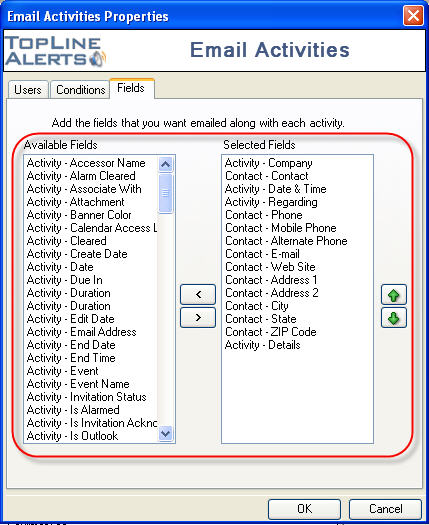
- The Fields tab allows you to select fields to be included in the email body. Highlight the field in the Available Fields column and click on the right arrow button to add to Selected Fields. Highlight the field in the Selected Fields and click on the left arrow button to remove the field. Use the up and down arrows to arrange the Select Fields order.
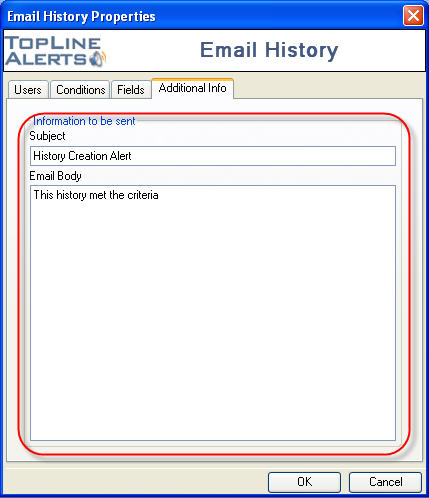
- The Additional Info tab allows you to specify the details of your email message. Enter the email subject and body. Field information from the previous tab will be included after the email body. (NOT IN ACTIVITY!!!)
See also
|